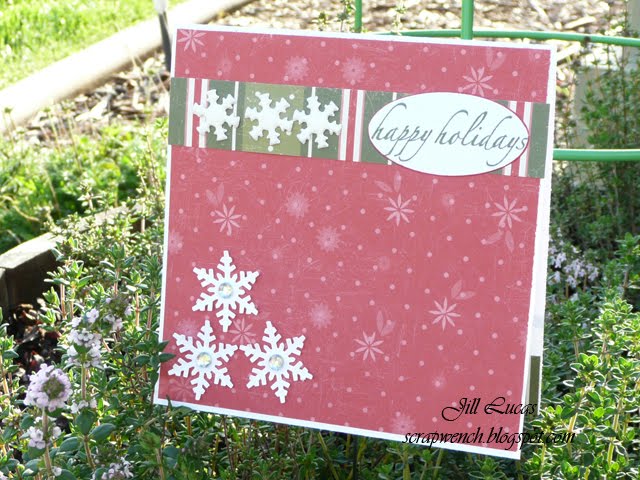
Showing posts with label Christmas. Show all posts

Monday, January 20, 2014

Studio J Layouts

I am horribly behind on my scrapbooking, but I actually managed to get this year's Christmas photos scrapped before New Year's Eve using Studio J.  There are SO many advantages to using Studio J, and the price is hard to beat.  You can choose from current papers or retired papers, and there are tons of layout options to accommodate your photos.  Plus, the embellishments and Stickease are available for every pack and color, making it possible to embellish your pages without spending a bundle.

Here are my Christmas 2013 Layouts.


Oh yeah, did I mention the free jpg files you get when you order Studio J layouts?

Visit my {website} and look under "Products" to find out how to get started with Studio J.

Monday, September 30, 2013

October 2013 Stamp of the Month Blog Hop

It's OCTOBER, and that means a Christmas-themed stamp set for the Close To My Heart stamp of the month!  Whether you arrived from {Krista's} blog or are just starting here, simply click on the link at the end of each post to go to the next blog in the hop.  This month we have over 50 consultants participating in the hop which features Scandinavian Wishes, a set of 12 stamps.

This stamp set has coordinating shapes that can be cut from the Cricut Art Philosophy cartridge, so I decided to make some ornaments or gift tags.


I used the Art Philosphy cartridge to cut out a few of the ornaments.  One great thing about the stamps that coordinate with the various Cricut cartridges is that the cartridge name, image size and page are listed on the stamp carrier right next to the image, making it virtually fool-proof.

I cut out the images, then stamped them with Versamark ink.  For two of them I used a colored embossing powder, but for two of them I used clear.  After allowing them to cool, I used a sponge to color the two that were heat embossed with clear powder (which allows the paper color to show through).  You could do a bunch of different things with these:  use ribbon or twine and hang them as ornaments or gift tags, add them as a dimensional element to a layout or card, put a bunch of them on a length of twine to create a garland (you could even use one alone to be a simple bookmark).


Remember, the October Stamp of the Month is only available from October 1st through 31st. Contact your Close To My Heart consultant, or click here to find out how to get this stamp set for yourself.

Now hop on over to {Kim's} blog to see what she's created.

If you find any broken links along the way, Kathleen has the complete list of hoppers here.

Saturday, August 31, 2013

September 2013 Stamp of the Month Blog Hop

Welcome to the September 2013 Stamp of the Month blog hop featuring Poster Tidings, a set of 2 stamps.   This month there are over 50 consultants participating in our hop.  Whether you've arrived here from {Sheila's} blog or are just getting started, simply click on the link at the end of each post to go to the next post in the hop.

This set has a lot of possibilities.  You could use the images to make bookmarks, gift tags, or on scrapbook pages.  I opted to use the Christmas stamp for a Christmas layout.

By stamping the image in several different colors, you can cut out the line that contains the word or words that you want to highlight.  I took it a step further by using Diamond Stickles on the highlighted words.  From this point you could mount the image on a card, mount it on another piece of cardstock and add a ribbon to make a tag or ornament, laminate it to make a bookmark...you get the idea.

Here I've added it to a Christmas layout that is ready to have photos added.

Remember, Poster Tidings is available September 1-30, 2013.  Contact your consultant, or click here, to get this stamp set for yourself.

Now hop on over to {Lori's} blog to see what she's created.

If you find any broken links along the way, Helen has the complete list of participating blogs here.

Friday, November 30, 2012

December 2012 CTMH Stamp of the Month Blog Hop

Welcome to the December 2012 CTMH Stamp of the Month Blog Hop, featuring Year-Round Cheer, a set of 12 Stamps.  If you've just arrived here from{Dawn's} blog, you are on the right path.  If you are just starting here, just jump in and enjoy our circular hop, which has over 50 participants this month.  When you reach the end of a post, click on the link to go "round" to the next post in the hop to see lots of "cheer".    

I love stamp sets like this that give you a bunch of stamps that are nearly the same size but a variety of subjects.  They are perfect for creating card sets (which make great gifts) or for building up your stash of cards.  They also work well for added sentiments to pre-made cards without sentiments (sort of "fill-in-the-blanks" card).    I decided to make some small cards using scraps from some favorite paper packs.  These square cards were made in 3" and 3.5" sizes.  I simply cut the bases, cut some scraps, and then stamped and mounted the images.  The 3" size make great gift cards to put on gift bags or bottles of your favorite adult beverages.  Use a hole punch in the corner and then tie it on using your favorite ribbon, string, tinsel...whatever you can think of.  


Remember, Year-Round Cheer is only available 1-31 December 2012.  Contact your Close To My Heart consultant, or click here, to find out how to order your own.  

Now hop on over to {Elizabeth's} blog to see her creation.


If you find any broken links along the way, Helen has the complete list on her blog.  

Wednesday, October 31, 2012

November 2012 Stamp of the Month Blog Hop

Welcome to the November 2012 CTMH Stamp of the Month Blog Hop, featuring Capture the Date, a set of 72 Stamps.  This month we have over 60 Close To My Heart consultants participating in our hop.  If you've just arrived here from {DiAnn's} blog, you are on the right track.  If you are just starting here, our round-robin hop can still be enjoyed in it's entirety.  Just follow the links at the end of each post, and eventually you'll end up right back here!

This stamp set seems as though it is meant for creating some great journaling blocks, date tags, and even invitations.  But I wanted to do something a little different.  Using our wonderful Cricut Artiste cartridge, I cut out this cute two piece card from Olive cardstock for the card base and Juniper cardstock for the wrapper, at the 4" size.  I then cut two squares of patterned paper (from the retired CTMH Jingle paper pack) and cardstock, rounded the corners, and mounted on the card front.  I cut a second wrapper from patterned paper, this one at 3.75".  The scalloped circle was cut and then sponged with Olive ink.  A little bit of ink, a few Twinkle Brads (sadly, also retired), and some Zots mounting dots equal a cute Christmas card.  This would also be great for any important date.  Don't you LOVE a versatile stamp set?


Papers: CTMH cardstock inCreme Brulee, Juniper, and Olive, CTMH Jingle
Inks: CTMH Olive and Tulip
Tools and Techniques: Cricut Artiste Cartridge, Marvy Uchida punch, corner rounder, CTMH Twinkle Brads, Zots glue dots, sponging
Stamp Sets: CTMH Capture the Date


Remember, Capture the Date is only available during the month of November 2012.  Ask your consultant, or click here, to find out how to "capture" your own.

Now hop on over to {Maria's} blog to find some more inspiration. 

If you find any broken links along the way, Helen has the complete list of participants {here}. 

Sunday, September 30, 2012

October 2012 Stamp of the Month Blog Hop

Welcome to the October 2012 CTMH Stamp of the Month Blog Hop featuring Very Merry Christmas, a set of 11 stamps.  If you've just arrived from {Melinda's} blog, you're on the right path.  If this is your starting point, simply click on the link at the end of each post to hop to the next and see what more than 60 Close To My Heart consultants created with this holiday set.

I felt compelled to use some non-traditional colors in my card today.  Rather than the traditional red and green, I used Creme Brulee, Grey Wool, Kraft, Outdoor Denim, and Twilight.  I followed this week's Mojo Monday sketch, and the patterned papers are from the retired CTMH Aspen paper package.  The colors are much more vibrant in person.  Hopefully Santa will bring me a DSLR camera for Christmas.

Cardstock: CTMH Grey Wool, Kraft, and Twilight
Patterned Paper: CTMH Aspen
Ribbon: CTMH Creme Brulee
Stamps: CTMH Very Merry Christmas
Ink: CTMH Twilight
Other: CTMH Ribbon, Cuttlebug Snow Dots embossing folder, Nestabilities Scalloped Square, dry brushing, direct-to-paper distressing, glue dots.

Remember, Very Merry Christmas is only available October 1-31, 2012.  Contact your CTMH consultant, or click here, to find out how to get your own.

Now hop on over to {Sheila's} blog to see her very merry project!

If you find any broken links along the way, {Helen} has the complete list of hoppers on her blog.

Friday, September 30, 2011

October 2011 Stamp of the Month Blog Hop

Welcome to the October 2011 Stamp of the Month Blog Hop featuring Holiday Magic, a set of 18 stamps.  If you are just arriving from {Teresa's} blog, you are on the right path.  If you are starting here, just click on the link at the end of each post to go to the next blog in the hop.

The October Stamp of the Month is always a Christmas stamp (well, at least "always" since 2007 that I can vouch for), so it is the perfect stamp to jump start your holiday crafting.  I decided to make gift tags, which I like to do every year.


Some ideas for attaching your gift tags are Embroidery Floss, Waxy Flax, and Hemp.  One thing I like to do with ribbon is punch a very small hole in the item (smaller than the width of the ribbon), and then run the ribbon through it.  The small size of the hole will hold the ribbon in place, so it isn't necessary to tie a knot.

Remember, Holiday Magic is only available October 1-31, 2011.  Contact your CTMH consultant, or click here, to find out how to get yours.

Now hop on over to {Wendy's} blog to see her magical creation.

If you find any broken links along the way, {Helen} has the complete list on her blog.

Sunday, November 14, 2010

November 2010 CTMH Spotlight Blog Hop Featuring Christmas Stamps

Welcome to the November 2010 CTMH Spotlight Blog Hop.  This month we are featuring Christmas Stamps.  If you've just arrived from {Jenifer's} blog, you are on the right path.  If you are just starting here, simply click on the link at the end of the post to go to the next blog on our circular hop.

I am simply ADORING the cute little "A" stamp sets.  Firstly, the prices were recently reduced, and I can't resist a bargain!  But most importantly, they are fantastic little sets in a cute little package.  For this month's project, I used A Timber, which features a flourished Christmas tree, a few additional decorations, some flourishes, and the "Happy Holidays" sentiment.  I also broke out my package of Colonial White Circle Cards and the Mistletoe Creative Basics pack.  I stamped the cute flourished tree in New England Ivy on Garden Green cardstock, then cut it out.  The card front was covered with the patterned paper, the sentiment was stamped on a chipboard ribbon slide (which was sponged with Bamboo ink), and then the chipboard was slid onto the gold ribbon from the Creative basics pack.  Some 3-D Mounting foam to attach the tree to the card front, a few CTMH Sparkles, and there we have an adorable little card.  Little does NOT have to equal boring! 


I hope you're inspired to use one of your smaller stamp sets to create something fun!  Now hop on over to {Chris'} blog for some more Christmas project inspiration.

If you find any broken links along the way, Wendy has the complete list of hoppers on her blog.

Thursday, October 14, 2010

October 2010 CTMH Spotlight Blog Hop

Welcome to the October 2010 CTMH Spotlight Blog Hop.  This month we are featuring Christmas Projects.  If you've just arrived from {Nikka's} blog, you are on the right path.  If you are just starting here, simply click on the link at the end of the post to go to the next blog on our circular hop.


My project is a My Creations Memory Keeper inspired by the talented Lisa Stenz.   You could make a box like this to keep the holiday cards and pictures you receive from family and friends this year, or make dividers from cardstock and use it to house special ornaments or decorations, or you can do like me and use it to store the Christmas cards that you make throughout the year (because we have all been so diligently working on our Christmas cards since January).  This box was decorated with cardstock and the lovely Evensong Creative Basics paper (which, I'm sad to say, is retired).  For the top of the box, I covered some chipboard letters in Evensong papers, and then used the Finishing Files to clean up the edges before using white paint along the edges of the letters (because unlike the wonderful CTMH Dimensional Elements letters, which are white, the chipboard I used was that oh-so-attractive blah gray-brown color).  For the letters that were stacked, I used 3-D Foam Squares (which I cut in half through the height so they wouldn't pop up too much).  I added snowflake brads to the corners, and now I have a great place to keep the Christmas cards I make throughout the year.  (No, really.  I really DO start my Christmas cards in January.  Last year I even had them finished by early December.  Mailing them, however, was a different story.)  I've had a box like this for a while, and one thing I would do different is use glue instead of adhesive runners to attach the papers, especially to the top of the box.  After some time, the papers on the top of the box that I used adhesive runners on isn't as smooth as I would like.  This is a project that you can make multiples of:  one for Christmas cards, one for Birthday cards, one for Thank You cards, one for gift card holders, the possibilities are limitless.  These would also make great memory boxes for newlyweds, new parents, or grandparents.  Heck, you can make one to give as a gift and one to keep for yourself.  Those are the BEST kind of projects!

Now hop on over to {Traci's} blog for some more Christmas project inspiration.

Monday, October 11, 2010

Let your paper do the work

These cards are from my scrap weekend a little while back.  These are for me to send out to the guys in Afghanistan so they will have some cards to send home to family and friends.  I decided to let my paper do the work.  The papers are from the DCWV Holiday Collection The Christmas Stack.  I used the patterned papers, adorned with sparkles or Stickles, a big decorative brad here or there, and minimal stamping. 


Thursday, September 30, 2010

October 2010 Stamp of the Month Blog Hop

Welcome to the October 2010 CTMH Stamp of the Month Blog Hop, featuring Share the Magic, a set of 12 Stamps.  If you've just arrived here from {Georgia's} blog, you are on the right track.  If you are just starting here, just jump in and enjoy our circular hop, which has over 60 participants this month.  When you reach the end of a post, click on the link at the end to go to the next post, easy peasy!!

My project is a set of 12 gift tags.  I thought it would be fun to do some heat embossing, so I chose a few different colors of paper with plans to use different embossing powders on them.  My first step was to punch out the tags, and then put in eyelets at the top for the ribbon/waxy flax.  Next, I put the "To:" and "From:" stamps on the block.  **Hint:  to put multiple stamps on the block exactly the way you want them, place the stamps on your work surface or on a piece of paper with the flat side up and in the positions that you want them in.  Then, set the block on top of the stamps and press gently.  Voila!  Perfectly positioned stamps for your project.  This is extremely useful when making words from alphabet stamps.**  The stamps were inked with Versamark, and then stamped on the tags.  Embossing powder was applied, making sure to brush away the excess powder before using the heat gun.  **Hint:  when heat embossing on both sides of an item, make sure that you remove the excess powder from the first side before embossing the second side.  Trust me, even if you don't intentionally put powder on the first side when you powder the second side, it WILL end up there.**  The snowman was colored in using markers, and ribbon and Waxy Flax were used for the hanging loop.


Papers: CTMH cardstock in Cranberry, Olive, Tulip, and White Daisy
Inks: CTMH Markers in Black, Chocolate, Cranberry, Goldrush, and Olive, Versamark
Tools and Techniques: Heat embossing, CTMH embossing powder in Black, Gold, and White, CTMH eyelets (old style) in Cranberry and Olive, CTMH Eyelet Kit (old style), CTMH ribbon, Waxy Flax, Marvy Uchida punch
Stamp Sets: CTMH Share the Magic


Remember, Share the Magic is only available during the month of October 2010.  Ask your consultant, or click here, to find out how to get this stamp for a discount or possibly even FREE!

Now hop on over to {Dawn's} blog to share in her magic. 
If you find any broken links along the way, Helen has the complete list of participants {here}.

Saturday, April 10, 2010

Sneak Peek at Studio J

Soon, you will be able to create fabulous digital scrapbook layouts from Close To My Heart.  There is a wonderful selection of paper packs (including some retired favorites and a Studio J exclusive pack for each new Idea Book).  I played around with it a few weeks ago, and will be sharing some of my layouts.  Studio J should go live later this month, and you will be able to access it from my CTMH website.  In the meantime, while almost all of my scrap stuff is on the way to Okinawa, I will share my digital scrapping with you.

This is our annual Christmas Eve tradition, baking cookies for Santa.  I love that I was able to use that close-up of the cookies the same as you might use a patterned paper.


We also open one gift on Christmas Eve, and this layout is of that tradition.  I love that I didn't have to cut the circle picture myself.


The little bits of gray you may have noticed at the top don't print, they are part of the tools for when you are creating your layouts.  You can switch left and right, rotate each layout, and rotate the papers within the layout, among other effects).  There are lots of embellishments you can add, including ribbon, buttons, threads, metal (brads, photo clips, etc), My Stickease, and even various distressing techniques.  One thing I forgot to do on the left page (after I rotated it) was to rotate the papers so that both sides matched.  But did you notice that before I pointed it out?  That's EXACTLY how I missed it.  I'm going to make myself a quick little checklist of things to verify when I approve my future layouts.  This won't entirely replace paper scrapbooking, but I can definitely see it having its place (especially when I want to create multiple copies of a layout, either for gifts or for others involved in the event).

I have other layouts created, but I will post those at a later time.

Sunday, April 4, 2010

Pastel'd Christmas Card

I made this acetate Christmas card following the Friday Sketchers Challenge #96 sketch, Sparkle's Christmas Card Challenge #18 (inspiration photo), and Christmas Cards All Year 'Round April Challenge (at least one soft pastel).  Instead of buying acetate card bases, I just bought a package of write-on transparency film, and cut it with my paper trimmer.


This is the inside.  I haven't chosen this year's Christmas card sentiment yet, so I'll stamp it later.

Papers: CTMH Blush and White Daisy cardstock, DCWV Holiday Collection The Christmas Stack
Inks: Brilliance Graphite Black, Copic Markers, Prismacolor marker, Sakura Gelly Roll White
Tools and Techniques: Nestabilities Classic Oval Large, Nestabilities Labels 1 (inside), unknown ribbon, 3-D Mounting Foam
Stamp Sets: CTMH Snow Friends

Lots of Christmas Cards

Today I used a sketch from 365 Cards and followed Sparkle's Christmas Card Challenge #17 (Snowflakes) and KL's Stampin' and Scrappin' (1-2-3 Recipe Challenge) to make a card.  Then I just decided to make a bunch of the same card, so I ended up with a total of ten.  The first five are mostly identical (I ran out of white snowflake brads, so I used embossing powder to cover silver snowflake brads to use--directions at the end of the post).  The next four, I kept the positions of the two papers the same, but on two had to use buttons instead of brads (because I ran out of snowflake brads), and the ink color for the sentiment and the distressing were reversed.  The last card has the paper position the opposite of the rest of cards, but I used the reverse side for some more variety.  The last five all received sparkles in the centers of the punched-out snowflakes.


Papers: CTMH White Daisy cardstock, CTMH Evensong Creative Basics
Inks: CTMH Cranberry and New England Ivy
Tools and Techniques: Nestabilities Petite Oval Large, Martha Stewart Snowflake punches, unknown white snowflake brads, unknown silver snowflake brads, Stampendous embossing powder (Winter Wonderland), Horizon Group USA sparkles, CTMH Craft Buttons (Holiday), direct-to-paper ink distressing (around the oval), Zots glue dots
Stamp Sets: CTMH Christmas Scripts


To use embossing powder to color your metal brads is fairly easy.  You will need a Craft Heater (CTMH product number Z555 is what I use), embossing powder, and some tweezers (I use CTMH Z1205, as they have a fine point, rubber grips so your fingers don't get hot, and reverse action so you don't have to squeeze to hold on to your item).  Grasp the brad by the "flaps" with your tweezers.  Using your craft heater, heat the front/top surface of your metal brad.  This may take some adjusting, depending on the size of your brad as well as the powder you are using.  I held these snowflakes fairly close to the heater for about 20 seconds, but a regular brad wouldn't require as much time.  Once heated, dip immediately in your embossing powder, tap off the excess and then heat again with your craft heater until the powder is melted smooth.  If a second coat is necessary, simply put it immediately back in the powder and repeat the tap and heat.  Voila, perfectly colored or matched brads for your project.  Keep in mind, some powders don't handle too much heat well, so err on the side of too little heat (which you can fix by heating more) rather than too much heat (which can cause your powder to discolor).

Sunday, February 7, 2010

First Christmas cards of 2010

Even without taking college classes this semester, 2010 has started out VERY busy for me.  Before creating these two identical cards, my scrapping total for 2010 was 4 pages, 3 cards and two altered items.  I really should have been cleaning, doing laundry, trimming my rose bushes or working out at the gym instead of scrapping, but sometimes a girl just HAS to scrap!!!  I am really hoping to have a productive week and get my March cards made, but I won't be holding my breath. :)  My January and February cards never ended up being made, so I know better!

I made this card following Mojo Monday sketch 124, Sparkle's 2010 Christmas Card Challenge Week #10 (use red and blue), and Cute Card Thursday Challenge 98 (Spots and Dots).  


Papers: CTMH Star Spangled Blue cardstock, DCWV  Holiday Collection The Christmas Stack, other cardstock
Inks: CTMH
Bamboo, Chocolate, Outdoor Denim
Tools and Techniques: Marvy Uchida Punches, CTMH ricrac ribbon, direct-to-paper ink distressing, 3-D Mounting Foam
Stamp Sets: CTMH Heartfelt Christmas and CTMH Just for the Holidays

Saturday, November 14, 2009

Postcard Sketch Inspiration Challenge Christmas Card

I needed to take a break from my homework, so I thought I'd try the OCC challenge.  This week's challenge is a sketch inspiration challenge for a postcard.   I think it turned out cute, and was a pretty quick (for me) card.


Papers:  CTMH cardstock, DCWV Holiday Collection The Christmas Stack
Inks:  CTMH Bamboo, Cranberry, Desert Sand, and Ponderosa Pine
Stamps:  CTMH No Peeking, Vintage Christmas, and Friendship Alphabet Small
Embellishments:  Prima flowers, Making Memories Crystal Brads
Tools and Techniques:  Direct-to-paper ink distressing

This is yet another card for Sparkle's Christmas Card Challenge (woohoo, number three for the week!!!). 

I guess I have to get back to the homework...

Tuesday, November 10, 2009

That was easy

Now I have the voice from the easy button going through my head.  But the sketch at Card Positioning Systems was very simple.  So in a quick few minutes, with no stamping and nothing complicated, I made this cute card.  Who says you have to make a complicated card to make a nice card???  Not me.


Papers:  DCWV Holiday Collection The Christmas Stack, CTMH cardstock Topiary and Holiday Red
Ribbon:  Michael's
Brad:  Creative Imaginations
Tools and Techniques:  3-D Mounting Foam

I guess that means one more for Sparkle's Christmas card challenge as well!

Monday, November 9, 2009

Mojo Christmas cards

Woohoo, today is (I think) only the second time I've actually made the Mojo Monday card on Monday.  I might even be one of the first 50 to post my card.  I made two, so that ups my Christmas card total by two.  I really think I will have my Christmas cards done by December 1st (Thank You Sparkle for the Christmas card challenge).  This card follows Mojo Monday sketch 112


Paper:  DCWV Holiday Collection The Christmas Stack, CTMH cardstock Topiary and Tulip
Inks:  CTMH Topiary, Versamark
Stamps:  CTMH Just for the Holidays
Ribbon:  Michael's
Tools and Techniques:  Nestabilities Circle and Classic Scalloped Circle Small, CTMH 1/4" long reach punch, heat embossing, 3-D Mounting squares

Monday, October 12, 2009

A Season That Sparkles

As I was clicking links on blogs this past weekend, I happened upon Flourishes. They had a post with the cutest card that had a chair that had been fabric-pieced. Very cool. So I kept reading and saw the Season That Sparkles challenge. Woohoo, an excuse to pull out my box-o-bling (yes, I really do have a box-o-bling. It is GOLD! It is a box I saved from my chocolate-dipped shortbread cookies that I brought back from Big Island Candies when I went to Hawaii. One day I will even cut a title for it on my Silhouette. And decorate it with more BLING! Oops, sorry, I went off on a tangent again.) and get SPARKLE-Y!


I decided to go ahead a try out the tri-shutter card I have been seeing so many of lately. Not too difficult, but the tutorial I found had a few of the measurements off. As long as I remember that for the next time, I'm good. The completed card is standard A2 size.


Papers: CTMH cardstock, CTMH Jingle Creative Basics
Inks: CTMH Chocolate, Juniper, Olive, Tulip
Stamp sets: CTMH Heartfelt Christmas, CTMH Card Chatter-Christmas
Tools and Techniques: Nestabilities Classic Oval Large, Martha Stewart Snowflake punches, CTMH Sparkles (there are 24 of those tiny things floating around the Christmas tree), Stampendous! Crystal Snow glitter in White (which was applied by running the snowflakes through my Xyron, then pouring the glitter over the adhesive--it doesn't tend to fall off using this technique)


Card open


Close up of the tree. There are 24 tiny little sparkles on there.


Close up of some of the snowflakes. The glitter doesn't photograph well, but it is definitely there.


View of the open card from above.

Sunday, October 11, 2009

Christmas Stickease

Well, so much for homework. I procrastinated just a little bit more to make this card. I followed the Mojo Monday sketch 107 for this Christmas card. I was troubled to find (after planning the card in my head before dragging everything over to the table) that I was out of Ponderosa Pine cardstock. So I improvised by using the back side of the polka-dotted paper from the Holiday Creative Basics pack (which is from before CTMH put patterns on both sides of the Background and Texture [B&T] paper). And I did NO stamping on this card (although I did use my stamp pads for ink distressing). The image on the scalloped circle and the patterned piece across the width of the card are both from the Everlasting My Stickease pack.